
Terraform is an open-source infrastructure as code software tool created by HashiCorp. It enables users to define and provision a data center infrastructure using a high-level configuration language known as Hashicorp Configuration Language (HCL), or optionally JSON.
Terraform supports a number of cloud infrastructure providers such as Amazon Web Services, IBM Cloud (formerly Bluemix), Google Cloud Platform, Linode, Microsoft Azure, Oracle Cloud Infrastructure, or VMware vSphere as well as OpenStack
Since this is going to be the process of Infrastructure as a Code paradigm. We need a API programmatic access for AWS.
So we are going to programmatically create terraform ec2 instance. This article is going to all about Terraform AWS Example and how to Create EC2 instance with Terraform.
If you want to compare Terraform with other IaC products like Ansible, Cloudformation. Don’t worry!. Terraform (hashicorp) themselves have done that job for you on their website
Terraform AWS Example
While AWS or Amazon web services being a leader in the cloud industry with a market share 70 percentage. I thought it would be wiser to choose AWS as our cloud provider for this post.
This post is about Terraform AWS and how to create AWS resources like EC2 instance and SecurityGroup with Terraform. Let us call it a Terraform AWS example.
Terraform and AWS go hand in hand and terraform has a lot of resources and configurations that support the entire AWS Infrastructure management tasks like AWS EC2 instance creation, Security Group creation, Virtual Private Cloud (VPC) Setup, Serverless set up, etc.
So let us go and do some farming in the AWS planet.
Authentication with AWS
In order to connect to AWS. Terraform has to successfully authenticate. It is done with the help of Programmatic API Keys (Access Key and Secret.)
Some Sample usage of these API Keys in a terraform configuration.provider “aws” { region = “us-west-2” access_key = “my-access-key” secret_key = “my-secret-key” }
So now, we should go and create these access and secret keys for your AWS account.
Setup Programmatic Access
Login to AWS Console, In the services, go to IAM and perform the following steps
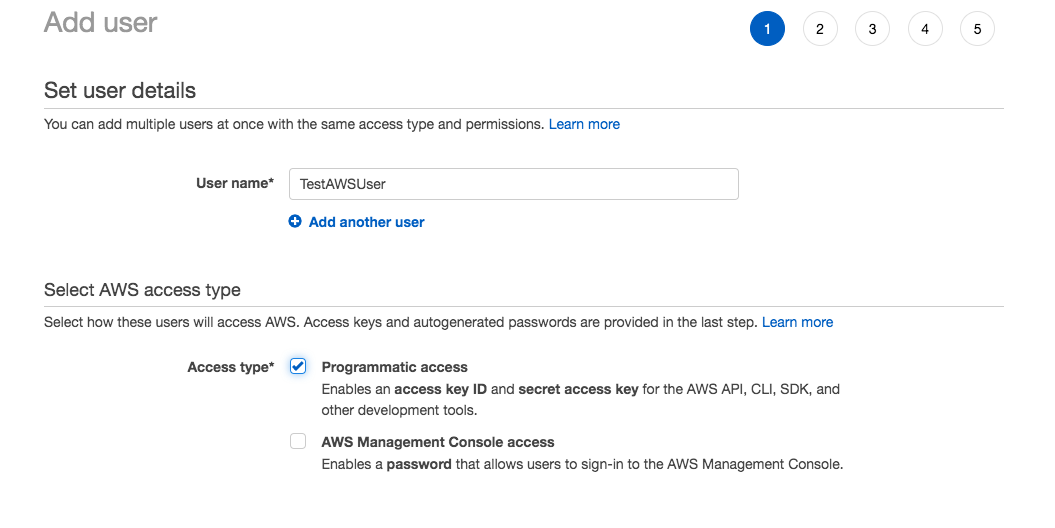
Step1: Add new user and key in the UserName Click to view the image
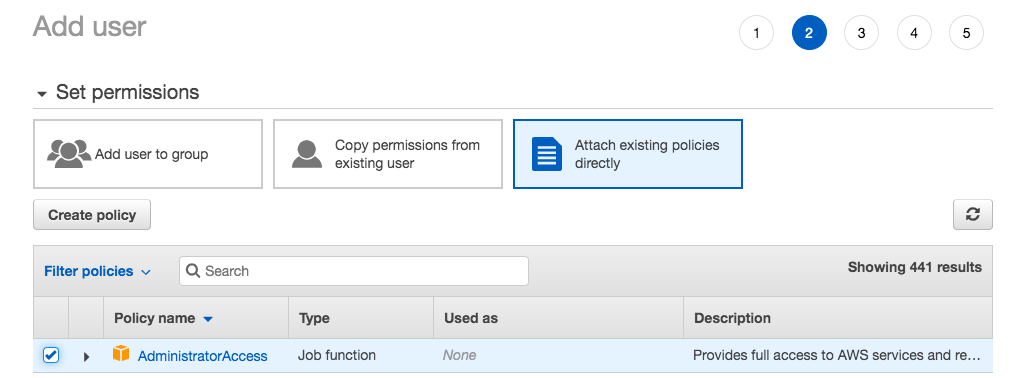
Step2: Attach Existing Policies and Select AdminClick to view the image
Let the Values be Default Click Next till you see the following Screen
Step3: Completion and DownloadClick to view the image
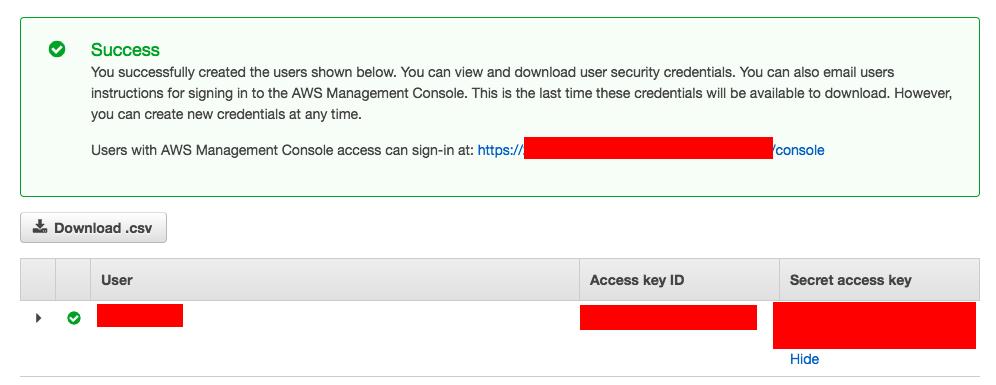
Note*: Once the Access Key ID and Secret Access Key is created you can download and save them somewhere safe and if you lost it you cannot recover (or) re-download it. You would have to create a new API key.
The best practice is to keep changing the API Access Key and recreating it. The older your API keys are the prone they are to Malicious attacks. So you should keep updating the API key and should not use the Same API key for a long period of time.
As you have downloaded the API Access and Secret keys. You need to save it right so that you can use it in terraform.
Though terraform accepts the Access Key and Secret Key hardcoded with in the configuration file. It is not recommended.
Either you should save these Keys as Environment variables (or) save it as a AWS Config profile.
As Environment Variable
In your terminal, you just have run these commands with your Access and Secret key.
$ export AWS_ACCESS_KEY_ID=AK************IEVXQ
$ export AWS_SECRET_ACCESS_KEY=gbaIbK*********************iwN0dGfS
As an AWS config Profile
In order to do this, The Simplest way is to download and setup AWS CLI
You can refer to this document how to setup AWS CLI
Download and Install Terraform CLI
Terraform is a Single file binary which you can download and run it without any additional installation.
To make this precise and Short I have not added the installation instruction of Terraform. You can find the instructions here Installing Terraform CLI
Now Let me proceed further with an assumption that you have installed the Terraform CLI.
Terraform Configuration file – A Quick intro
The input file for terraform is known as Terraform Configuration. Terraform configuration is written in a specific language named Hashicorp Configuration Language and it can optionally be written in JSON as well.
Here is the sample Terraform Configuration file saved with *.tf extension
The following file presumes that you are using the AWS Config profile. So it refers to the profile: default for the authentication.provider “aws” { profile = “default” region = “us-east-1” } resource “aws_instance” “example” { ami = “ami-2757f631” instance_type = “t2.micro” }
In case if you are using the Environment variables method. You can remove the profile line alone and that should be it.
Terraform configuration file would ideally have lot of elements known as blocks such as provider , resource etcetera.
This is a Syntax of how Terraform Configuration file block is formattedresource “aws_vpc” “main” { cidr_block = var.base_cidr_block } <BLOCK TYPE> “<BLOCK NAME>” “<BLOCK LABEL>” { # Block body <IDENTIFIER> = <EXPRESSION> # Argument }
There are ample amount of BLOCK_TYPE available in Terraform and the resource is primary and all others are to support building that specified resource.
Some of the Terraform blocks (elements) and their purpose is given below,
- providers – the provider name aws, google, azure etc
- resources – a specific resource with in the provide such as aws_instance for aws
- variable – to declare input variables
- output – to declare output variables which would be retained the Terraform state file
- local – to assign value to an expression, these are local temporary variables work with in a module
- module – A module is a container for multiple resources that are used together.
- data – To Collect data from the remote provider and save it as a data source
To be continued…